Thursday, 24 November 2011

Assignment 1 - Intro

Alhamdulillah..Akhirnya siap juga Assignment 1 ini..

Penghargaan yang tak terhingga kepada Syazwani, Nur Aminah dan Hazwani yang sama-sama bekerja keras bagi menghasilkan projek ini. 

Memandangkan kami membahagikan tugas, jd terdapat 8 .fla fail yang dibuat secara berasingan dan di"link"kan antara satu sama lain.

Inilah hasil daripada kami :-) Semoga ia berguna dan bermanfaat kepada semua.

Assignment 1 - Home

Home


In this part, we make simple interactive environment with buttons.

Below is the flash.

Assignment 1 - Lesson

Lesson
In this part, we make simple interactive environment with buttons.

Below is the flash.

Assignment 1 - Exercise 1

 Exercise 1

Multiple choice question using dialog box.

In this exercise, user need to choose the correct answer for the clothes given and press "Submit" button.

Below is the flash.

Assignment 1 - Exercise 2

Exercise 2

In this part, we are using Text Entry Question and Multiple Choice Question.

Below is the flash.

Tuesday, 1 November 2011

Week 7

Creating A Multiple Choice Question using Dialog box


Kita dah pelajari bagaimana membuat  Text Entry Question, Multiple Choice Question  and Drag & Drop Activity. Minggu ini pula kita pelajari cara membuat MCQ question tapi menggunakan Dialog Box.

Ok..setelah soalan disiapkan, pilihan jawapan boleh dibuat dengan cara:

1.  Window > Components > User Interface > ComboBox.
2.  Pilih component yang dibuat tadi di stage dan namakan box sebagai instance name.
3. Untuk tulis pilihan jawapan, Window > Components Inspector > Data . Kemudian klik simbol + untuk menulis pilihan jawapan. Lakukan langkah yang sama untuk labels.


 4. Masukkan Dynamic Text pada keyframe 2  sebagai respon kepada jawapan. Var : jg
5. Add Back button di keyframe 2 dan dibelakang button tersebut, masukkan actionscript:
on (release) {
gotoAndStop(1);
jg = "";
}

6. Add Submit button di keyframe 1 dan dibelakang button tersebut, masukkan actionscript:
on (press) {
if (box.getValue() == "fan")
{
jg = "Sorry, wrong answer! Please select again!";
}
if (box.getValue() == "pan") {
jg = "Yes, it is a pan.";
}
if (box.getValue() == "can") {
jg = "Sorry, wrong answer! Please select again!";
}
gotoAndStop(2);
}

7. Pada frame 1, masukkan actionscript:
stop();

8. Test movie

Drag and Drop Activity

Happy Birtday!!!!

Monday, 24 October 2011

Week 6

Drag and Drop Activity


Untuk membuat aktiviti ini, semua yang akan di drag dan tempat yang akan di drop adalah movie clip.

1. Buat movie clip symbol untuk sebuah rectangle box. Pada frame 1, draw a rectangle. Pada frame 2, insert keyframe dan tambah tanda right. Masukkan actionscript stop(); pada kedua-dua frame.
2. Buat movie clip symbol untuk circle dan rectangle.
3. Bina 3 layer.
  • Layer Response - mengandungi dua rectangle box daripada (1). Intance namepada rectangle pertama dinamakan sebagai box1 sebagai manakala rectangle kedua dinamakan box2. Masukkan juga arahan dan label setiap rectangle box.
  • Layer Circle - mengandungi circle dan rectangle daripada (2) dan Next button.
  • Layer Action - Masukkan actionscript stop();
4. Pada belakang movieclip symbol-circle, masukkan actionscript:
on (press) {
                startDrag(this);
}
on (release) {
                stopDrag();
if ((this._x>=290.0) & (this._x<=360.8) & (this._y>=86.8)& (this._y<=110.0)) {
                                                _root.box1.gotoAndStop(2);
                }else {
                                _root.box1.gotoAndStop(1);
                                this._x = 55.2;
                                this._y = 110.0;
                }
}


Pada belakang movieclip symbol-rectangle, masukkan actionscript:
on (press) {
                startDrag(this);
}
on (release) {
                stopDrag();
if ((this._x>=290.0) & (this._x<=349.6) & (this._y>=206.0)& (this._y<=232.6)) {
                                                _root.box2.gotoAndStop(2);
                }else {
                                _root.box2.gotoAndStop(1);
                                this._x = 46.7;
                                this._y = 220.2;
                }
}

 
Next button will link us to another .swf file. The .swf file must be located in the same folder with this file. Pada belakang Next button, masukkan actionscript:
on (release) {loadMovieNum("cooking-ratatouille-kitchen.swf",0);
}


5. Test movie

Thursday, 20 October 2011

Multiple Choice Questions


Ieja,ini file .fla nya.. Tolong yer...TQVM..

https://sites.google.com/site/authoringsystemsyakira/myswf/MCQ.fla?attredirects=0&d=1

UPGRADE VERSION


Setelah diubah untuk mengatasi masalah beberapa kekeliruan..

Ini fail .fla nya :
https://sites.google.com/site/authoringsystemsyakira/myswf/MCQ-edited.fla?attredirects=0&d=1

Week 5 cont..

Text Entry Question (updated)


Hurmm....masalah yang sy hadapi ialah answer y case sensitive - kalau answer "nose" betul tapi kalau answer "Nose" salah..
    Masih mencari solusinya..any idea frenz?


    Step by step:

    1. Bina beberapa layer mengikut keperluan.
    2. Gunakan Static Text untuk soalan, Input Text (var : answer) untuk ruang jawapan daripada pengguna dan Dynamic Text (var : respon) untuk respon kepada jawapan pengguna.


    3. Bina layer stop dan masukkan actionscript :
            var respon;
            var answer;
            respon = ""
            answer = ""
            stop();

    4. Bina layer button, masukkan Check Button dan Next Button.
    Actionscript untuk Check Button :
    on (release, keyPress "<Enter>") {if (answer.toLowerCase()== "nose") {respon="Correct! Good job.";
                    }else{
                    respon="Incorrect. Your answer " + answer + " is incorrect.";
    }
    }
    Actionscript untuk Next Button :
    on (release) {gotoAndPlay("Scene 2", 1);

    }
    5. Test movie

    Wednesday, 19 October 2011

    Farm Activity


    Menarik kan??hehe..

    Cara-caranya agak mudah..Perkara yang penting ialah, setiap imej yang nak dijadikan sebagai hotspot perlu berada pada layer sendiri..kemudian convert to symbol dan pilih button..double click it and you can now editing the button symbol..

    There are 4 states of the button:
    1. Up - when the mouse isn't over the button
    2. Over - when the mouse is over the button
    3. Down - when you click your mouse on the button
    4. Hit - the active area that is the button - the region the user can hit or roll over
    Untuk aktiviti 'Farm' ini, nama binatang dimasukkan pada state over dan down. bunyi binatang dimasukkan pada state down sahaja. But we have to import the sound to library first..

    Next, test movie =D

    5 scene

    Week 5

    How are you guys?
    Still ok huh ofter the class?? =D
    Sekarang dah kene speed ni..kalau tak, susah nanti nak catch up..bg saya sendiri pembelajaran kali ini agak sukar..tapi yang penting, perlu mencuba dan terus berusaha..

    Minggu ini kita belajar macam mana nak masukkan sound dalam button..maka dengan ini, terjawab sudah persoalan yang bermain-main dalam fikiran saya sepanjang membuat homework minggu lepas..jadi, saya telah menambahbaik homework saya berdasarkan ilmu yang saya dapat semalam..

    Bagi rakan guru-guru yang mungkin ada mengajar English tahun satu, andai anda merasakan flash ini boleh digunakan sebagai ABM, dipersilakan menggunakannya..hehe..

    The Making of Transportation.swf

    1. Buat story board..lukis je secara kasar kat kertas tentang perancangan setiap scene dan button dan actionscript..mudah untuk kita buat kerja nanti..

    2. Bina setiap scene.

    3. Masukkan actionscript - stop pada setiap scene..
         Caranya,
    1. add a new layer and rename it as action..
    2. right click on any frame in that layer and choose Action
    3. Add icon (+) > Global Function > Timeline Control > stop
    4. anda boleh ubah dengan cara drag it ke mana-mana frame yang appropriate..

    4. Masukkan button untuk actionscript-gotoAndPlay
          Caranya,
    1. masukkan button (boleh buat sendiri atau ambil dari button library)
    2. right click at button on stage and choose Action.
    3. Add icon (+) > Global Function > Movie Clip Control > on > release
    4. move the blinking cursor in { symbol and click Add icon (+) > Global Function > Timeline Control > gotoAndPlay.
    5. Dalam bracket ( ) taip nama scene and frame yang hendak di link kan..


    Kemudian, test movie to make sure everything is okay..hehe :-)

    Inilah hasil sy yang telah ditambah baik..

    Tuesday, 11 October 2011

    Week 4

    No class for this week tapi homework tetap ada..
    Hmmm...inilah hasil pembelajaran scene concept and actionscript and button..still agak blur tp akan tetap berusaha..


    bercita-cita nk masukkan sound mcm kwn-kwn yang lain buat tp xbrapa nk menjadi..sy akan menambahbaik flash ini selepas tau cara masukkan sound untuk setiap kenderaan ini..

    Secara ringkasnya, scene concept ini membina beberapa scene dlm 1 fail..Selama ini kita buat 1 scene, 1 fail .fla..Tapi sekarang buat 1 fail .fla ada beberapa scene..Actionscript sangat penting untuk control..Button yang ada menjadikannya lebih interaktif..

    Saturday, 1 October 2011

    Week 3

    Kelas untuk minggu ketiga ini dimulakan dengan melihat first flash yang dibuat oleh semua rakan kelas..semuanya cantik-cantik belaka..ada diantara kami yang memasukkan muzik dalam flash mereka..sangat menarik..nanti nak berguru yer =)

    Kemudian kami belajar 3 jenis animasi dalam flash..

    1. Motion Guides Animation


    Secara ringkasnya, objek (ant) yang ingin digerakkan must be converted into symbol..then create a guide layer dengan cara pilih 'ant layer' dan klik simbol seperti gambar dibawah. Kemudian klik 1st keyframe pada 'Guide layer' dan lukis path yang ant akan lalu menggunakan PENCIL TOOL. Lastly, snap the ant to the guide and tambah keyframe lagi sebagai titik akhir path yang ant akan lalu and snap it again..
    Edit la serba sedikit agar pergerakan ant nampak smooth..


    2. Traditional Animation


    Cara melakukannya sangat ringkas..
    Lukis satu karektor pada keyframe pertama. Kemudian, buatlah satu siri keyframe dan ubah sedikit setiap satu. Dalam animasi saya ini, saya mengubah kedudukan anak mata dan mulut karektor ini. Sangat mudah kan..


    3. Image Sequence


    Insert > New Symbol > Movie clip
    File > Import > Import to Stage > pilih image sequence yang hendak diguna.
    Kembali ke scene 1 and bolehlah diedit. Cara tambah scene ialah Insert > Scene.


    Scene 1
    Bunny yang berjalan adalah dari satu siri imej yang tersusun, dan dijadikan sebagai movie clip symbol. Begitu juga dengan burung yang terbang. Saya menggunakan motion guide animation untuk bunny manakala burung hanya menggunakan motion tween.


    Scene 2
    * Macam mana nk buat bunny tu pusing nampak realistik sikit? saya tak reti..minta tunjuk ajar...TQ..


     * Terima kasih Kak Ashikhin coz kongsi cara masukkan flash dlm blog..i like..hehe :-)

    Monday, 26 September 2011

    My First Flash - Step by step

    Assalamualaikum w.b.t.

    Untuk membuat rumusan tentang apa yang telah dipelajari pada hari Selasa lalu, saya telah membuat flash (sudah ditambah baik) ini berdasarkannya.

    Masa yang saya gunakan untuk menghasilkannya adalah lebih kurang sehari . Mungkin bagi mereka yang telah berpengalaman hanya memerlukan masa yang singkat.

    Saya mula berlatih melukis dgn cara tracing dan mencari cara paling mudah untuk melakukannya. Di sini saya akan kongsikan teknik yang mungkin berguna dan memberi manfaat kepada teman-teman. Sebarang kesilapan haraplah ditegur kerana saya juga masih belajar :-)

    Perkara yang paling penting untuk kita ketahui ialah  TOOLS PANEL. Ia merupakan rakan karib kita dalam Flash CS3 ini. Sebaiknya kita tahu segala fungsinya agar dapat memudahkan kita memilih tools yang tepat untuk digunakan (saya sendiri masih explore fungsinya).

    LANGKAH 1:

    TRACING IMAGES WITH THE ONION SKIN TOOL
    File > New
    File > Import > Import to stage
    Adjust the size according to your need. Better for you to name each of every layer so you won't confuse later. Saya namakan layer ini sebagai 'head'.

    Pada layer 'head', right-click frame yang yang kedua dan pilih Insert Keyframe. Clik pada gambar dan delete it. Next, click on the ONION SKIN tool. Imej untuk di tracing akan nampak samar-samar dan anda boleh mulakan kerja2 tracing ini menggunakan tools mengikut keselesaan anda.
    FYI, saya banyak gunakan LINE TOOL dan SELECTION TOOL kerana bagi saya ia lebih mudah berbanding dengan menggunakan PENCIL TOOL. (sebenarnya, saya memang fail bab-bab lukis tangan ni. tangan keras =P)


    *Zoom kan agar lebih mudah untuk trace dan dapat hasil yang lebih smooth..

    Selain itu, anda boleh juga menggunakan pelbagai gambar yang berlainan untuk jadikan satu objek. Saya menggunakan gambar saya untuk muka, baju daripada gambar kartun lain dan latar belakang daripada gambar yang lain =D

    Setelah selesai melukis, sesi mewarna pula bermula. Warnakan objek yang dilukis menggunakan PAINT BUCKET TOOL mengikut kreativiti masing-masing samada warna Solid, Linear, Radial atau Bitmap.

    LANGKAH 2:

    CREATE A BASIC MOTION TWEEN
    Awan yang saya lukis dalam satu layer khas dijadikan sebagai GRAPHIC SYMBOL agar dapat menghasilkan basic motion tween. Kemudian, insert keyframe pada frame lain dan ubah objek tersebut dari tempat asal ke tempat baru atau ubah saiz objek mengikut kemahuan anda menggunakan FREE TRANSFORM TOOL. Antara keyframe pertama, dan seterusnya, right-click dan pilih Create Motion Tween. Ia akan berubah menjadi biru dengan anak panah lurus.


    *Antara tujuan sesuatu objek dijadikan sebagai simbol adalah untuk menjimatkan saiz. Sebanyak mana sekalipun simbol itu digunakan, saiznya tetap sama.


    LANGKAH 3:

    CREATE SHAPE TWEENS
    Seperti biasa, objek perlu berada pada layernya sendiri. Berbeza dengan motion tween, objek yang ingin di'shape tweens'kan tidak boleh sama sekali di'group'kan atau dijadikan simbol. Anda perlu pecahkan ia dengan cara Modify > Break Apart. Untuk tulisan, langkah ini perlu dilakukan sebanyak dua kali.

    Kemudian, insert keyframe pada frame lain dan ubah objek tersebut kepada objek baru mengikut kemahuan anda. Antara keyframe pertama, dan seterusnya, right-click dan pilih Create Shape Tween. Frames akan berubah menjadi hijau dengan anak panah lurus.
    Saya akui saya mempunyai kelemahan dalam mengagak masa yang sesuai agar tulisan yang terdapat dalam flash saya dapat dibaca dengan mudah. Saya akan cuba perbaikinya :-)


     LANGKAH 4:

    MATA KARTUN BERKEDIP-KEDIP.
    Sebenarnya, saya pelajari teknik ini berdasarkan flash tutorial yang diberi oleh Dr. Zaidatun di dalam blog.
    Mata yang dilukis perlu berada pada layernya sendiri. Right-click frame kedua dan pilih Insert Keyframe. Ubah mata tersebut menjadi tertutup. Copy frame 1 dan paste pada frame 3. Copy frame 2 dan paste pada frame 3. Copy frame 3 dan paste pada frame 5. Apabila anda pilih Control > Test Movie, mata kartun akan berkedip-kedip. Mudah kn??


    MASALAH:
    Antara masalah yang saya hadapi ialah untuk paint langit secara gradient. Warna biru berada di kanan dan memudar kepada warna putih di kiri padahal saya mahukan biru di atas dan memudar putih di bawah. Saya lakukan ini dengan cara memusingkan rectangle yang saya lukis. Apa cara sebenarnya untuk melakukannya?Any ideas, please..

    Saya harap, perkongsian ilmu ini memberi manfaat kepada kita semua.

    Thursday, 22 September 2011

    My First Flash

    Dear Dr. Zaidatun and classmates,
    Feel free to open this link and leave comments & suggestions..
    I really appreciate it..


    https://sites.google.com/site/authoringsystemsyakira/myswf/welcometomyauthoringblog.swf?attredirects=0

    TQ =)

    Tuesday, 20 September 2011

    Week 2

    WOW!! our class today was very interesting.. I really enjoyed it.. Sampai tak perasan dah petang =D
    Banyak ilmu baru yang berjaya saya pelajari.. Seronok gunakan flash ni..

    My 1st impression pada flash ni sebenarnya adalah susah..tapi lepas dah explore2 berbekalkan bantuan uncle google, tutorial dari blog http://mpt1193.blogspot.com/ , reference book dan yang paling penting tunjuk ajar dari Dr. Zaida, saya dah mulai faham sedikit demi sedikit..cuma kena banyakkan berlatih lagi supaya mantap..hehe..

    For next entry, i'll share with you more about flash ok.. Good night!!

    Relax!!!

    I found this video very interesting..wanna share with all of you..
    I hope you enjoy watching this!!

    Standalone Application and Web


     1. Are both using the same technology?
    No.

    2. What are the differences?
    Standalone application is a program that does not require operating system's services to run. It can work offline and does not necessarily require network connection to function.
    A web application is an application that is accessed over a network such as the Internet or an intranet. The term may also mean a computer software application that is hosted in a browser-controlled environment (e.g. a Java applet) or coded in a browser-supported language (such as JavaScript, combined with a browser-rendered markup language like HTML) and reliant on a common web browser to render the application executable.

    3. When is the appropriate time to develop standalone applications or web-based application?
    Standalone application can be developed when there is limited or no internet connection. In the other hand, web-based application can be developed when the internet connection is good.

    4. Which one you prefer?
     I prefer standalone application since it can be developed and used at any time. 


    Web - cont.

    9. What are the skills that you have to learn to make your webpage interactive?
    Skills in Photoshop, Dreamweaver, Flash and standards based HTML and CSS is needed to make an interactive webpage. By using this skills, I can integrate graphics, picture, animation, audio etc in my webpage.

    10. What are ASP, JSP, Cold Fusion, PHP etc?
    ASP : Active Server Pages
    JSP : JavaServer Pages
    Cold Fusion : a programming language based on standard HTML (Hyper Text Markup Language) that is used to write dynamic webpages.
    PHP : Hypertext Preprocessor

    Web

    1. What is a webpage, website, portal?
    Webpage consist only one HTML or XHTML file. Website is a collection of webpages. Portal is a collection of websites which has everything in there. It is usually categorize into some field or subject.
    eg: 
    Webpage 


    Website


    Portal


     2. What are multimedia elements that can be integrated into a webpage? 
    Static images may be raster graphics, typically GIF, JPEG or PNG; or vector formats such as SVG or Flash. 
    Animated images typically Animated GIF and SVG, but also may be Flash, Shockwave, or Java applet.
    Audio, typically MP3, ogg or various proprietary formats.
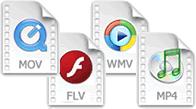
    Video, WMV (Windows), RM (Real Media), FLV (Flash Video), MPG, MOV (QuickTime)
    Interactive text: see DHTML. 
    Interactive illustrations: ranging from "click to play" images to games, typically using script orchestration, Flash, Java applets, SVG, or Shockwave.

    3. How to integrate graphics into a webpage?
    You may use Dreamweaver to integrate graphics into a webpage. [video]

    4. What are the graphics file extensions that can be accepted in WWW medium?
    .jpeg, .png and .gif

    5. How to integrate audios videos into a webpage and what are the file extensions?
    [video] 

    Video Formats

    Videoformats          The MP4 format is the new and upcoming format for internet video. It is supported by YouTube, Flash players and HTML5.

    Format File Description
    AVI .avi The AVI (Audio Video Interleave) format was developed by Microsoft. The AVI format is supported by all computers running Windows, and by all the most popular web browsers. It is a very common format on the Internet, but not always possible to play on non-Windows computers.
    WMV .wmv The Windows Media format is developed by Microsoft. Windows Media is a common format on the Internet, but Windows Media movies cannot be played on non-Windows computer without an extra (free) component installed. Some later Windows Media movies cannot play at all on non-Windows computers because no player is available
    MPEG .mpg
    .mpeg
    The MPEG (Moving Pictures Expert Group) format is the most popular format on the Internet. It is cross-platform, and supported by all the most popular web browsers.
    QuickTime .mov The QuickTime format is developed by Apple. QuickTime is a common format on the Internet, but QuickTime movies cannot be played on a Windows computer without an extra (free) component installed.
    RealVideo .rm
    .ram
    The RealVideo format was developed for the Internet by Real Media. The format allows streaming of video (on-line video, Internet TV) with low bandwidths. Because of the low bandwidth priority, quality is often reduced.
    Flash .swf
    .flv
    The Flash (Shockwave) format was developed by Macromedia. The Shockwave format requires an extra component to play. But this component comes preinstalled with web browsers like Firefox and Internet Explorer.
    Mpeg-4 .mp4 Mpeg-4 (with H.264 video compression) is the new format for the internet. In fact, YouTube recommends using MP4. YouTube accepts multiple formats, and then converts them all to .flv or .mp4 for distribution. More and more online video publishers are moving to MP4 as the internet sharing format for both Flash players and HTML5.


    Sound Formats

    Format File Description
    MIDI .mid
    .midi
    The MIDI (Musical Instrument Digital Interface) is a format for electronic music devices like synthesizers and PC sound cards. MIDI files do not contain sound, but digital musical instructions (notes) that can be played by electronics (like your PC's sound card). Click here to play The Beatles.
    Since MIDI format only contains instructions (notes), MIDI files are extremely small. The example above is only 23K in size but it plays for nearly 5 minutes. MIDI is supported by many software systems over a large range of platforms. MIDI is supported by all the most popular Internet browsers.
    RealAudio .rm
    .ram
    The RealAudio format was developed for the Internet by Real Media. The format also supports video. The format allows streaming of audio (on-line music, Internet radio) with low bandwidths. Because of the low bandwidth priority, quality is often reduced.
    Wave .wav The Wave (waveform) format is developed by IBM and Microsoft. It is supported by all computers running Windows, and by all the most popular web browsers (except Google Chrome).
    WMA .wma The WMA format (Windows Media Audio), compares in quality to MP3, and is compatible with most players, except the iPod. WMA files can be delivered as a continuous flow of data, which makes it practical for use in Internet radio or on-line music.
    MP3 .mp3
    .mpga
    MP3 files are actually the sound part of MPEG files. The MPEG format was originally developed for video by the Moving Pictures Experts Group. MP3 is one of the most popular sound formats for music. The encoding system combines good compression (small files) with high quality. Expect future software systems to support it.

    source: http://www.w3schools.com/html/html_media.asp

    6. How to integrate animations into webpage and what are the file extensions?
    [video]
    .swf, .exe

    7. What are the software that can be used to develop a webpage?
     Dreamweaver, Joomla, HTML Editor, FrontPage etc.

    8. How to make your webpage interactive?
    The interactive webpage should be two-way flow of information, enabling the user to enter information and send it back to the web server for processing. It will be more interesting and fun if the web page consist of variety of multimedia elements which are properly organized.
    [video]


    Monday, 19 September 2011

    Courseware

     
    1. What is an educational courseware?
          Educational software is computer software which the primary purpose is for teaching or self-learning.


        2. What are multimedia elements that can be integrated into a courseware?
          Text, sound,video, animations and graphic.

    Text
    Out of all of the elements, text has the most impact on the quality of the multimedia interaction. Generally, text provides the important information. Text acts as the keystone tying all of the other media elements together. It is well written text that makes a multimedia communication wonderful.


    Sound
    Sound is used to provide emphasis or highlight a transition from one page to another. Sound synchronized to screen display, enables teachers to present lots of information at once. This approach is used in a variety of ways, all based on visual display of a complex image paired with a spoken explanation (for example, art – pictures are ‘glossed’ by the voiceover; or math – a proof fills the screen while the spoken explanation plays in the background). Sound used creatively, becomes a stimulus to the imagination; used inappropriately it becomes a hindrance or an annoyance. For instance, a script, some still images and a sound track, allow students to utilize their own power of imagination without being biased and influenced by the inappropriate use of video footage. A great advantage is that the sound file can be stopped and started very easily.

    Video
    The representation of information by using the visualization capabilities of video can be immediate and powerful. While this is not in doubt, it is the ability to choose how we view, and interact, with the content of digital video that provides new and exciting possibilities for the use of digital video in education. There are many instances where students, studying particular processes, may find themselves faced with a scenario that seems highly complex when conveyed in purely text form, or by the use of diagrams and images. In such situations the representational qualities of video help in placing a theoretical concept into context.
    Video can stimulate interest if it is relevant to the rest of the information on the page, and is not ‘overdone’. Video can be used to give examples of phenomena or issues referred to in the text. For example, while students are reading notes about a particular issue, a video showing a short clip of the author/teacher emphasizing the key points can be inserted at a key moment; alternatively, the video clips can be used to tell readers what to do next. On the other hand, it is unlikely that video can completely replace the face-to-face lecture: rather, video needs to be used to supplement textual information.
    One of the most compelling justifications for video may be its dramatic ability to elicit an emotional response from an individual. Such a reaction can provide a strong motivational incentive to choose and persist in a task.
    The use of video is appropriate to convey information about environments that can be either dangerous or too costly to consider, or recreate, in real life. For example: video images used to demonstrate particular chemical reactions without exposing students to highly volatile chemicals, or medical education, where real-life situations can be better understood via video.

    Animation
    Animation is used to show changes in state over time, or to present information slowly to students so they have time to assimilate it in smaller chunks. Animations, when combined with user input, enable students to view different versions of change over time depending on different variables.
    Animations are primarily used to demonstrate an idea or illustrate a concept. Video is usually taken from life, whereas animations are based on drawings. There are two types of animation: Cel based and Object based. Cel based animation consists of multiple drawings, each one a little different from the others. When shown in rapid sequence, for example, the operation of an engine’s crankshaft, the drawings appear to move. Object based animation (also called slide or path animation) simply moves an object across a screen. The object itself does not change.

    Graphics
    Graphics provide the most creative possibilities for a learning session. They can be photographs, drawings, graphs from a spreadsheet, pictures from CD-ROM, or something pulled from the Internet. With a scanner, hand-drawn work can be included. Standing commented that, “the capacity of recognition memory for pictures is almost limitless”. The reason for this is that images make use of a massive range of cortical skills: color, form, line, dimension, texture, visual rhythm, and especially imagination.


    3. How to distribute a standalone multimedia courseware?
          By using CD-ROM, pendrive or upload it in the internet for others to use.
        
    Credit to: 
    http://en.wikipedia.org/wiki/Educational_software 
    http://encyclopedia.jrank.org/articles/pages/6821/Multimedia-in-Education.html


    Thursday, 15 September 2011

    Assalamualaikum w.b.t dan Salam Sejahtera..


    Alhamdulillah..
    Akhirnya dapat juga saya menyambung pelajaran di UTM untuk peringkat sarjana. 
    Salam perkenalan kepada Assoc. Prof. Dr. Zaidatun Tasir dan teman-teman. Semoga kita semua dapat berkongsi ilmu dan pengalaman khususnya berkaitan Authoring System.
    I feel so excited to learn and explore all the things related to authoring system. Frankly speaking, I know nothing about Adobe Flash and Adobe Dreamweaver. But I'm ready to learn all of it. Hopefully I can turn myself from ZERO TO HERO!! =)
    Dear friends, let's do our best in this course together..